
Mastering Aviation: Land or Die How to Land Smoothly Every Time in Roblox
Learn Land or Die how to land smoothly with our comprehensive Roblox guide. Master altitude, throttle settings, and terminal approach for every plane.
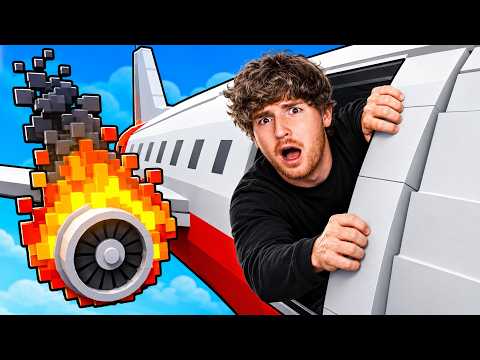 Popular gameplayLearn Land or Die how to land smoothly with our comprehensive Roblox guide. Master altitude, throttle settings, and terminal approach for every plane.YouTube
 In the high-stakes world of Roblox aviation, knowing Land or Die how to land smoothly is the difference between a successful flight and a fiery explosion. For many aspiring pilots, the final approach is the most nerve-wracking part of the journey, where a single degree of error can result in a catastrophic crash. Learning Land or Die how to land smoothly requires a mix of altitude management, speed control, and environmental awareness that goes beyond simply pointing the nose of the plane toward the runway.
Whether you are piloting the accessible Doogee BC3 or the massive B700 airliner, the physics of this survival game demand precision. According to player experience, many newcomers struggle with "bouncing" or clipping through the terminal, which usually stems from a misunderstanding of the game's specific altitude thresholds. This guide will break down the exact mechanics you need to master the perfect touchdown.
Pre-Flight Preparation: Setting the Stage for Success
A smooth landing begins long before you see the terminal. Experienced pilots emphasize that preparation starts at the refueling station. If you attempt a landing with a low fuel tank, you risk the engines cutting out during the most critical phase of your descent. Community reports suggest that once you enter the landing sequence, you will not have the time or the maneuverability to refuel, making a full tank a non-negotiable prerequisite for safety.
Weather also plays a massive role in your success. While the game features dynamic weather patterns, clear skies are the gold standard for those learning the ropes. Cloudy weather and lightning storms introduce turbulence and visibility issues that can easily ruin a perfect setup. If you are practicing your technique, wait for a clear day to minimize external variables.
The Pre-Landing Checklist
Before you even reach the 100-mile marker, you should ensure your aircraft is configured correctly. Following a standardized checklist can prevent the "forgetful pilot" syndrome that leads to gear-up landings.
| Task | Importance | Recommended Timing |
|---|---|---|
| Refuel | Critical | Before takeoff or mid-flight |
| Check Weather | High | 100 miles before terminal |
| Deploy Landing Gear | Essential | 75 miles before terminal |
| Set Altitude to 4,000 | High | 100 miles before terminal |
| Monitor Fuel Level | Critical | Throughout the flight |
The 100-Mile Descent Strategy
The real work begins when you have 100 miles left on your flight path. At this distance, you should aim to be at an altitude of approximately 4,000. This is a safety buffer. Community reports indicate that ground terrain can be treacherous; staying at 4,000 prevents you from accidentally clipping into hills or mountains that might not be fully rendered or visible in poor weather.
As you cruise at 4,000, keep a close eye on the distance counter. The game undergoes a significant transition at the 50-mile mark. At this point, the standard ground terrain disappears, and the landing terminal spawns into the world. If you are too low when this happens, you risk colliding with the newly spawned structures.
Altitude Milestones by Distance
To understand Land or Die how to land smoothly, you must follow a specific descent profile. Below is the community-recommended altitude progression for a standard approach.
| Distance to Terminal | Target Altitude | Objective |
|---|---|---|
| 100 Miles | 4,000 | Terrain avoidance and preparation |
| 75 Miles | 4,000 | Landing gear deployment |
| 50 Miles | 74 - 84 | Terminal spawn and alignment |
| 25 Miles | 60 - 70 | Stabilizing parallel approach |
| 5 Miles | 69 (Ideal) | Final touchdown stabilization |
Mastering the Terminal Entry
The "secret sauce" to a perfect landing in Land or Die is achieving a parallel entry. You do not want to be diving toward the runway; instead, you want to be flying perfectly level with it as you enter the terminal zone. This requires you to drop from 4,000 altitude to your landing altitude immediately after the 50-mile mark.
For the starter Doogee BC3, the magic number is 74. You must be at an altitude of 74 or below to ensure you don't fly right over the terminal. However, you shouldn't go too low—dropping below 55 altitude can cause your plane's wheels to clip into the floor, leading to a "glitchy" landing or a total flip. Player experience suggests that an altitude of 69 is the "sweet spot" for a buttery smooth touchdown on the Doogee BC3.
Plane-Specific Altitude and Throttle Settings
Different planes have different physical profiles in the game engine. A larger plane requires a slightly higher approach to account for its landing gear length and fuselage size.
| Plane Model | Max Landing Altitude | Ideal Altitude | Throttle Setting |
|---|---|---|---|
| Doogee BC3 | 74 | 69 | Medium (Both Engines) |
| B700 Private Jet | 84 | 78 | Medium (One Engine Off) |
| Airliner | 84 | 80 | Medium (Low) |
| Small Prop | 70 | 65 | Medium-High |
For larger jets like the B700, pilots often recommend shutting off one engine while keeping the throttle at medium. This provides a more controllable speed, preventing the plane from overshooting the runway while maintaining enough lift to stay parallel.
Navigating Environmental Challenges
Even with the perfect altitude, the environment can throw a wrench in your plans. Wind gusts are a common occurrence, especially if you are transitioning out of a storm front. A sudden gust can lift your altitude by 5 to 10 points, potentially pushing you above the 74-altitude threshold for the Doogee BC3.
To counter this, always double-check your angle. Your nose should be level. If you see your altitude climbing unexpectedly, a slight downward pitch is necessary, but avoid overcorrecting. The goal is to "ride the rail" all the way into the terminal. If you miss the parallel entry, it is often safer to attempt a manual correction than to nose-dive, though manual corrections at high speeds are notoriously difficult for beginners.
Common Pitfalls and How to Avoid Them
Many players fail because they treat Land or Die like a standard flight simulator. However, the Roblox engine handles collisions and "smoothness" based on specific hitboxes. If you are learning Land or Die how to land smoothly, you must avoid these common errors:
- Late Gear Deployment: Forgetting the landing gear is the number one cause of "explosive" landings. Make it a habit to deploy them at 100 miles.
- The "Dive" Approach: Trying to descend rapidly at 10 miles left will almost always result in a bounce or a crash. You need at least 40 miles of level flight to stabilize.
- Fuel Neglect: As mentioned, running out of fuel at 20 miles left is a death sentence. You lose throttle control, and your descent becomes an unpowered glide, which is nearly impossible to land smoothly in this game.
- Over-speeding: Entering the terminal at full throttle will often cause the plane to skip off the runway like a stone on water. Medium throttle is your best friend.
For more information on general flight mechanics, you can visit the official Roblox platform to explore other aviation simulations and compare physics engines.
Advanced Tactics: Solo vs. Multiplayer
Landing solo is generally considered easier because you have full control over the weight and balance of the aircraft. In multiplayer sessions, passengers can sometimes affect the "feel" of the plane, though this is often debated in community forums. Regardless, if you are carrying passengers, your priority should be their comfort—which in Land or Die terms simply means "don't let the plane explode."
When flying solo, you can experiment more with engine cut-offs. Some advanced pilots practice "dead-stick" landings where they cut all power at 5 miles left, allowing the plane's momentum to carry it to a stop. This is high-risk, however, and not recommended until you have mastered the medium-throttle parallel approach.
Troubleshooting Your Landing
| Issue | Likely Cause | Solution |
|---|---|---|
| Plane Bounces | Speed too high / Angle too steep | Reduce throttle to medium; enter parallel |
| Clipping Through Floor | Altitude below 55 | Maintain altitude between 65 and 74 |
| Overshooting Terminal | Altitude above 74/84 | Descend to target altitude by 50-mile mark |
| Engine Stall | Out of fuel | Refuel before the 100-mile marker |
Conclusion
Mastering the art of the landing in Land or Die is a rite of passage for every Roblox pilot. By focusing on the 50-mile transition, maintaining a parallel approach at the correct altitude (around 69–74 for starters), and managing your throttle settings, you can turn a stressful experience into a routine success. Remember that practice is key—don't be discouraged if your first few attempts end in a splash. Keep your eyes on the altimeter, stay calm, and you'll be landing like a pro in no time.
Frequently Asked Questions
What is the secret to Land or Die how to land smoothly?
The secret is maintaining a parallel approach at a specific altitude threshold. For starter planes like the Doogee BC3, you should aim for an altitude of approximately 69. You must be at this altitude before you reach the 50-mile mark, where the terminal spawns, to ensure you enter the landing zone level with the runway rather than diving toward it.
Why does my plane keep bouncing when I try to land?
Bouncing usually occurs because your speed is too high or your angle of approach is too steep. To fix this, ensure your throttle is set to "Medium" and that you are flying parallel to the ground before you reach the terminal. If you nose-dive into the runway, the game's physics engine will likely cause the aircraft to deflect upward.
Does the weather affect how I should land?
Yes, weather is a major factor. Clear skies are the easiest for landing. If you are flying in cloudy or stormy weather, wind gusts can push your altitude up or down, potentially ruining your alignment. In these conditions, you must be extra vigilant in monitoring your altimeter and making small, manual corrections to stay within the 69–74 altitude range.
At what distance should I start my final descent?
You should begin preparing at 100 miles by staying at 4,000 altitude. The final descent to your landing altitude (74 or below) should happen immediately after the 50-mile mark, as this is when the terminal spawns and the ground terrain disappears. Being at the correct altitude by the time you enter the terminal zone is critical for a smooth touchdown.
Sources and Related Guides
Official and related pages for Mastering Aviation: Land or Die How to Land Smoothly Every Time in Roblox.
Related Guides
Land or Die All Endings: The Complete Guide to Every Flight Outcome
Master Bacon Airlines flight 067 with our guide to Land or Die all endings. Learn how to survive engine fires, UFOs, and turbulence to land safely.
Land or Die Beginner Guide: Ultimate Tips to Survive Every Roblox Flight
Master the chaos of Roblox's Land or Die with our ultimate beginner guide. Learn camera controls, emergency management, and teamwork strategies.
Land or Die How to Land Like a Pro: Master Emergency Survival in Roblox
Struggling with emergency landings? Learn how to land in Land or Die with our expert guide on managing systems, calming passengers, and surviving the chaos.
Land or Die How to Play: The Ultimate Survival Guide to Roblox's Most Chaotic Flight Sim
Master the chaos of Bacon Airlines! Learn Land or Die how to play with our guide on emergency landings, fixing engines, and surviving UFO attacks.